
Building the “Rantaberi” guitar.
Part Two: Making the body
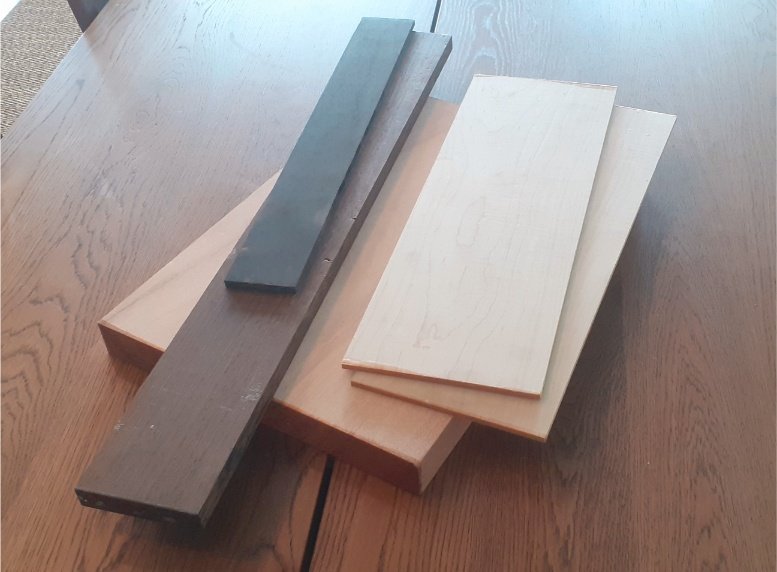
Where it all started. A lump of mahogany, a length of wenge, a strip of ebony, and two boards of maple.
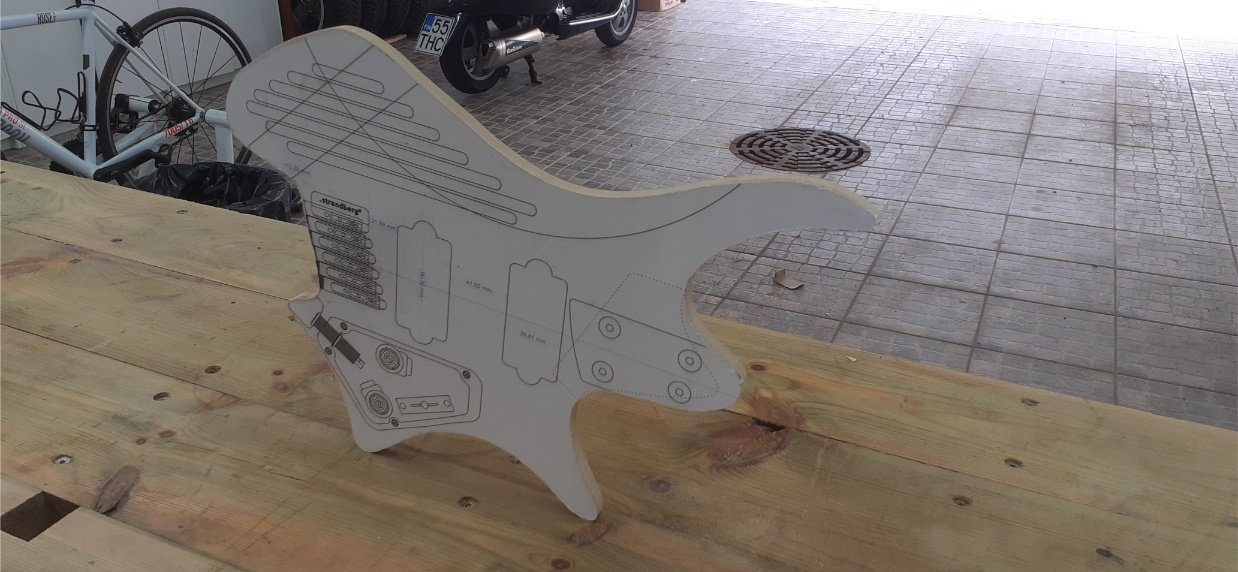
I found a design for a Strandberg guitar, printed it, stuck on to MDF, and cut out. This was used a routing template for the outline, and subsequently the cavities. I didn't use the neck pocket, pickups, or bridge position on the design, as they were not correct for the scale lengths I wanted. (Click the image for a link to the printable design.)
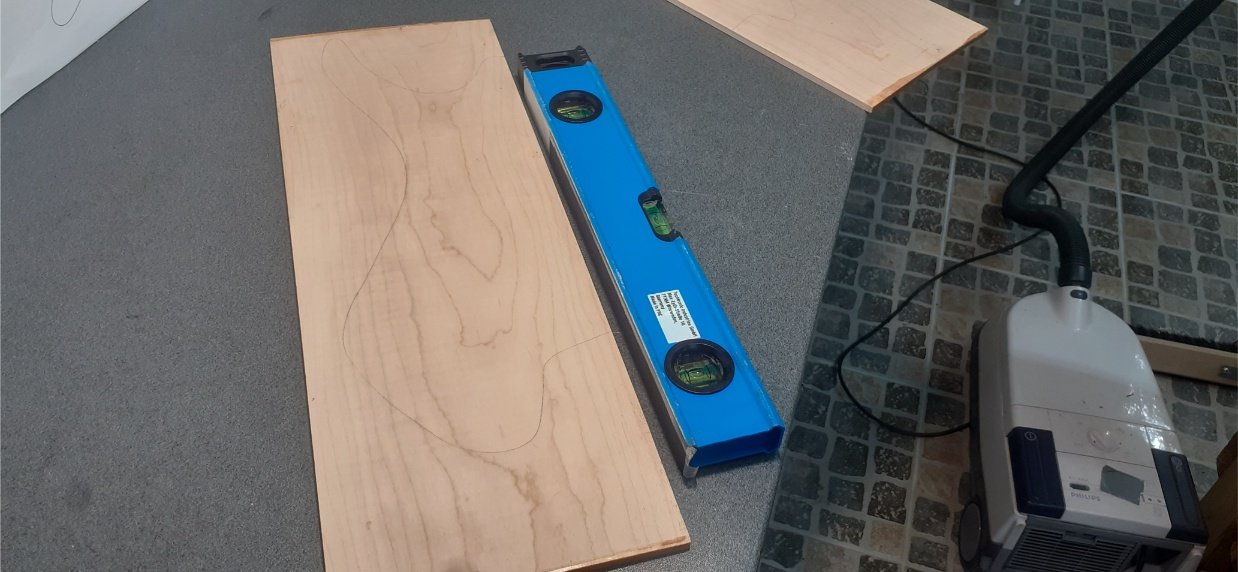
The maple top was in two 6mm thick pieces that needed jointing together. This had to be a perfect, invisible joint. I straightened and flattened to 90 degrees both inner edges with sandpaper stuck to a spirit level. The work bench is flat and the spirit level is square in cross section. This resulted in a good square and flat gluing surface.
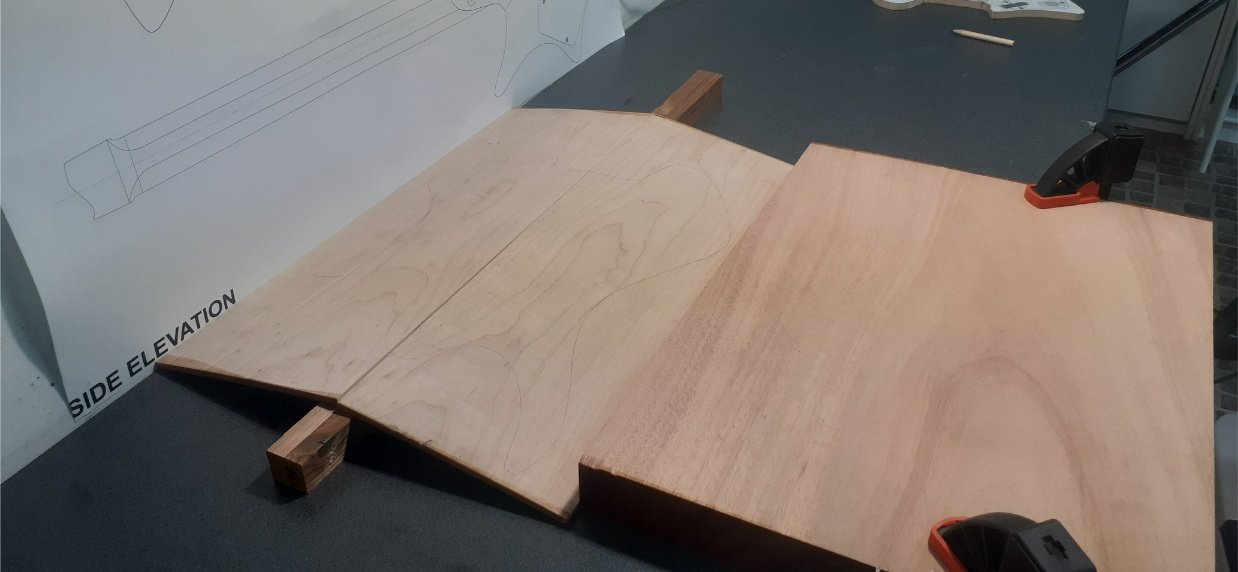
This was my admittedly ingenious method for clamping the joint tight during gluing. The back edge of the first board is up against the wall. The second board is up against a solid block of wood, clamped firmly to the bench. A strip of scrap raises the middle into a tent.
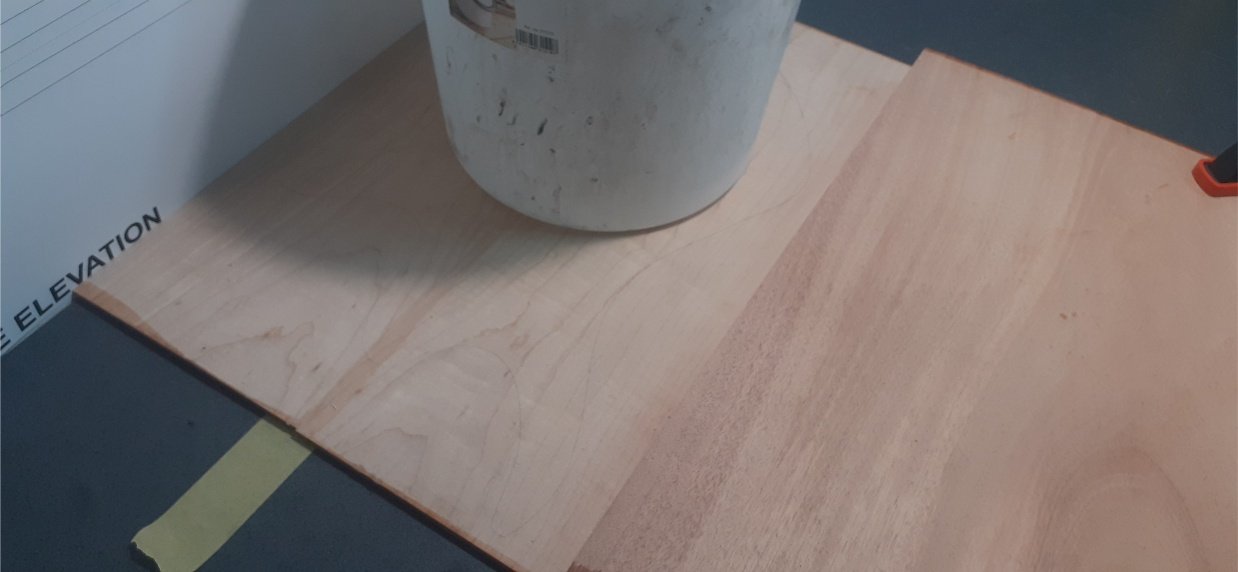
The surfaces are coated in glue, and then a heavy weight (a bucket of water in this case) goes on top. This forces the tent shape flat, which in turn forces the joint closed. (I put a few bits of scrap under the bucket to even the load, not pictured.) A strip of masking tape under the joint stops it sticking to the bench top.
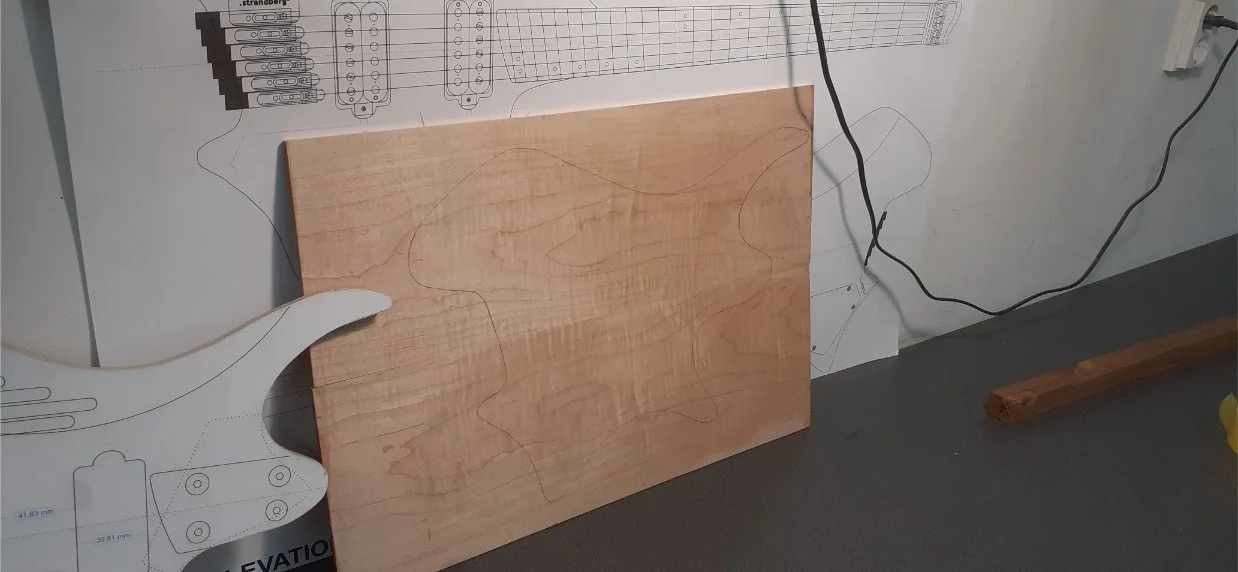
The jointed board. This actually worked very well. The joint was almost perfectly aligned, and didn't need much planing flat, and it is invisible on the finished instrument.
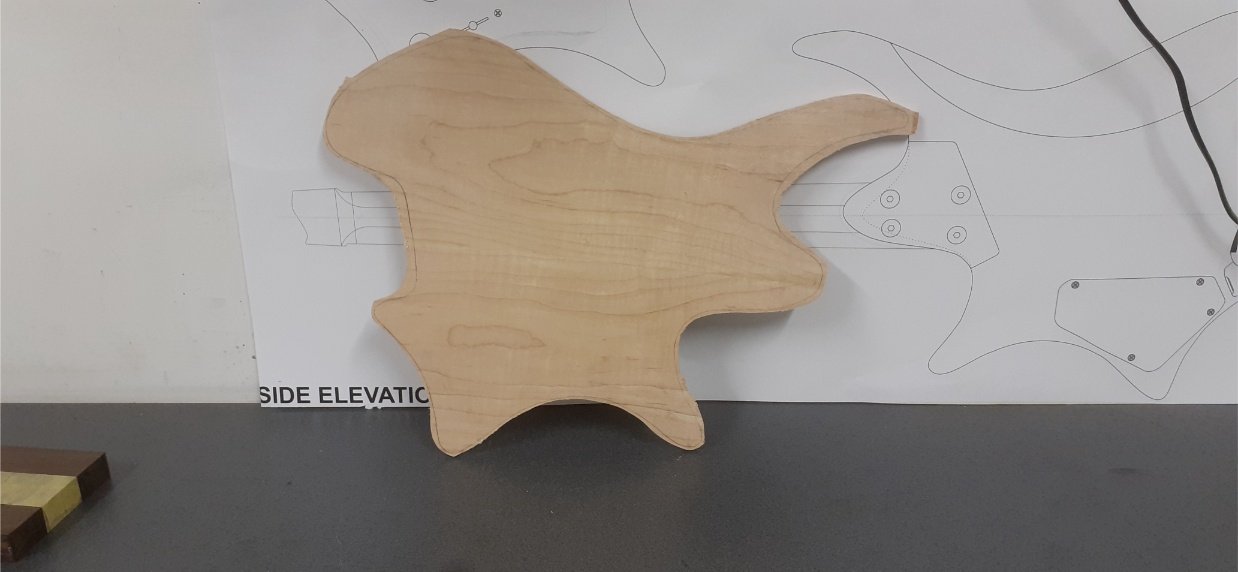
The top was then cut roughly to shape.
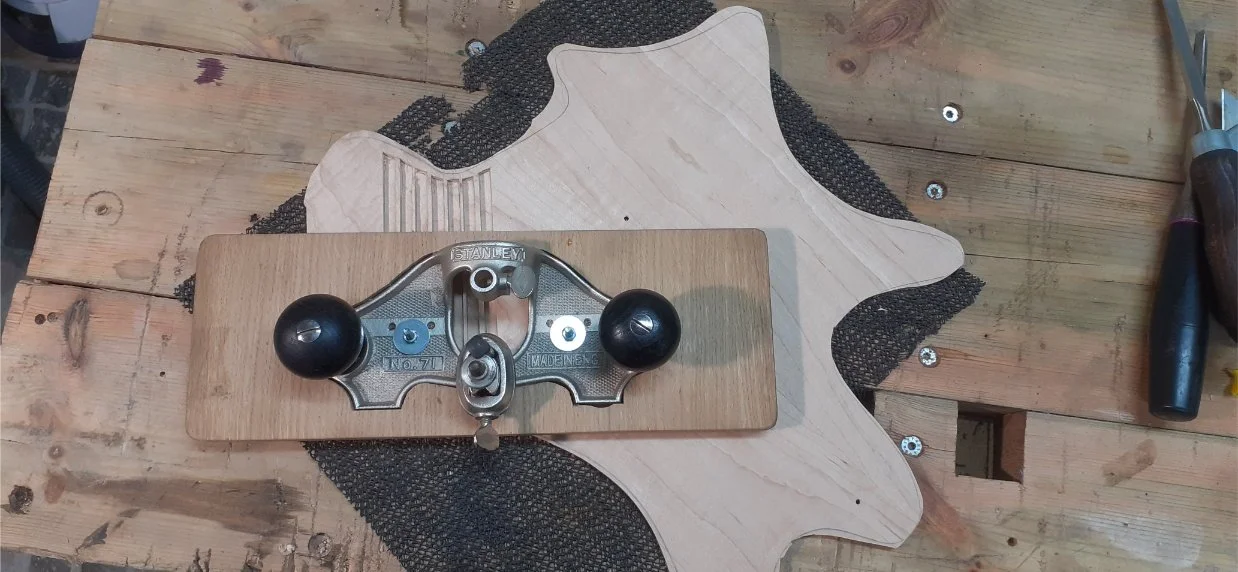
Using the Stanley No. 71 router plane to cut channels in the underside of the maple top. This was supposed to make it easier to bend over the forearm contour. I made a bit of a mess of this, but it didn't matter as it's on the underside.
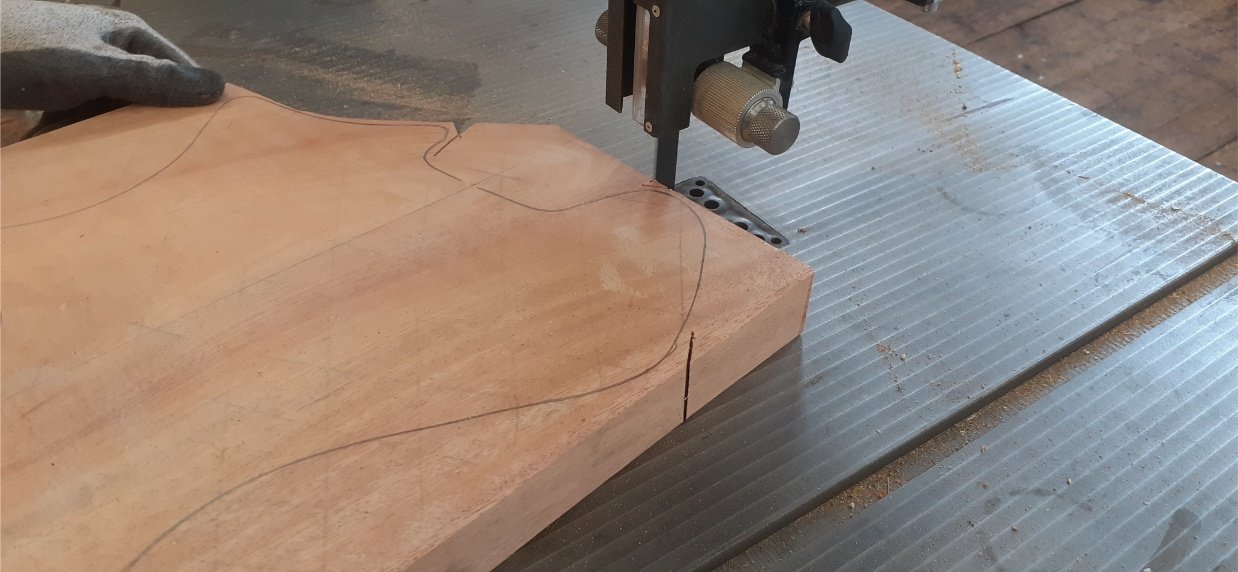
The mahogany slab was rough cut on a friend's bandsaw. Thanks Andreas!
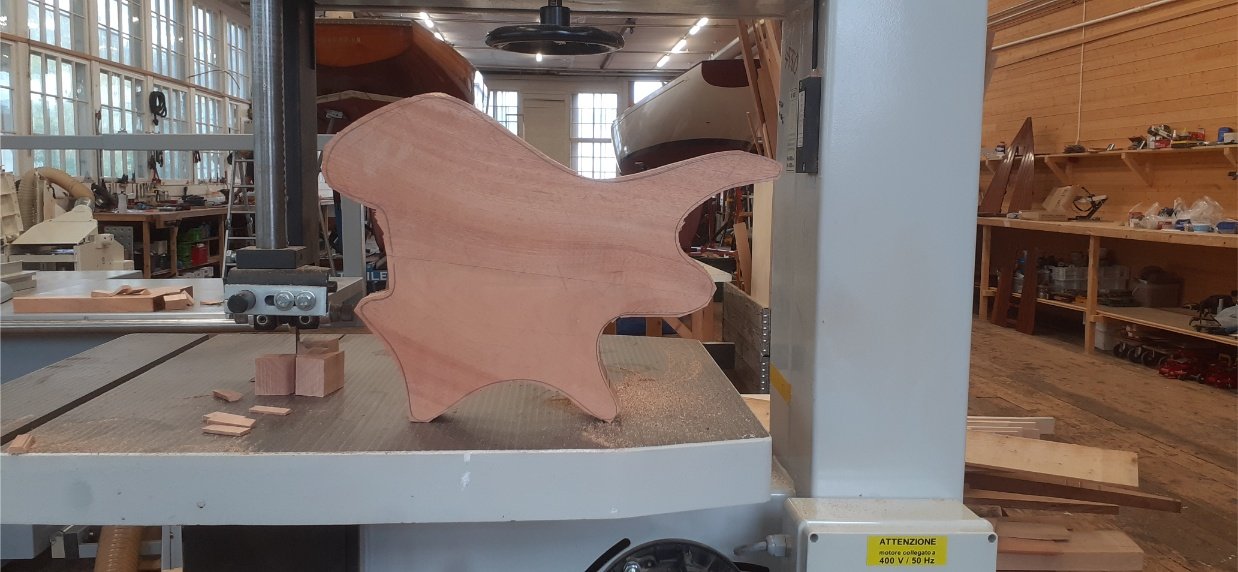
The rough cut outline of the body.
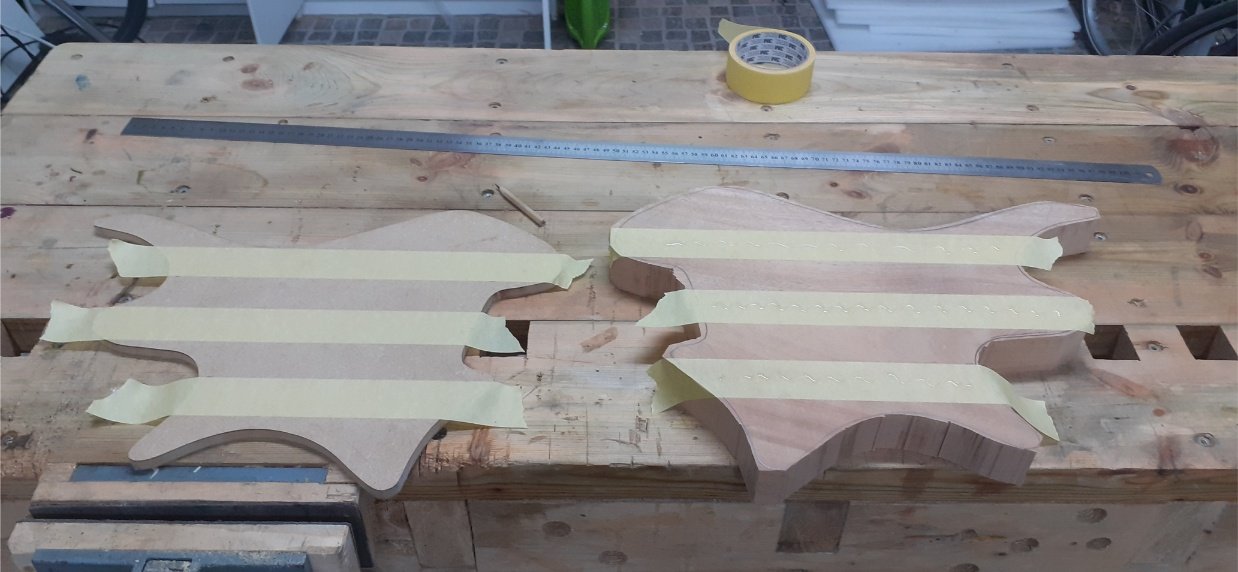
Sticking the template to the body using the masking tape and superglue trick.
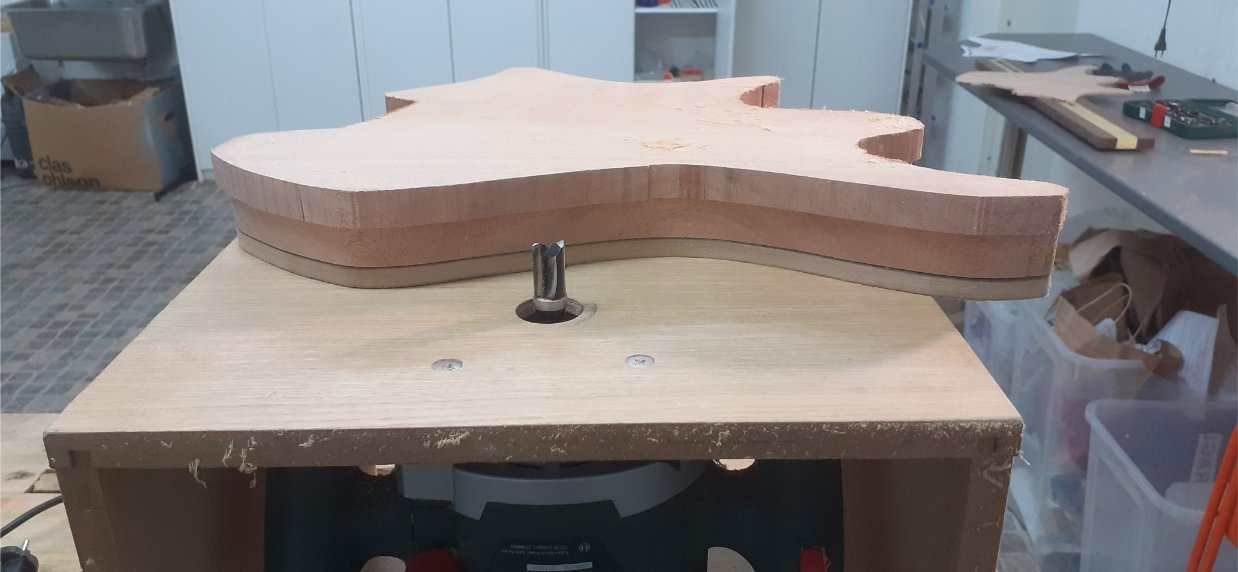
With a flush-cut bit on the router, getting the body to the same shape as the template.
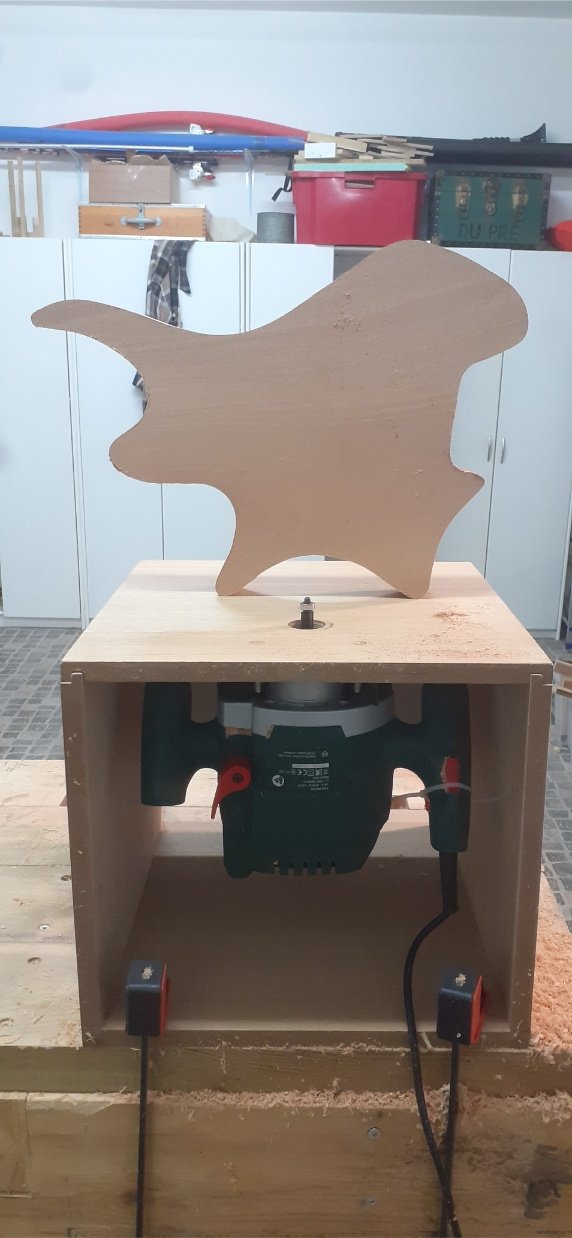
The final shape of the body, on my home made router table.
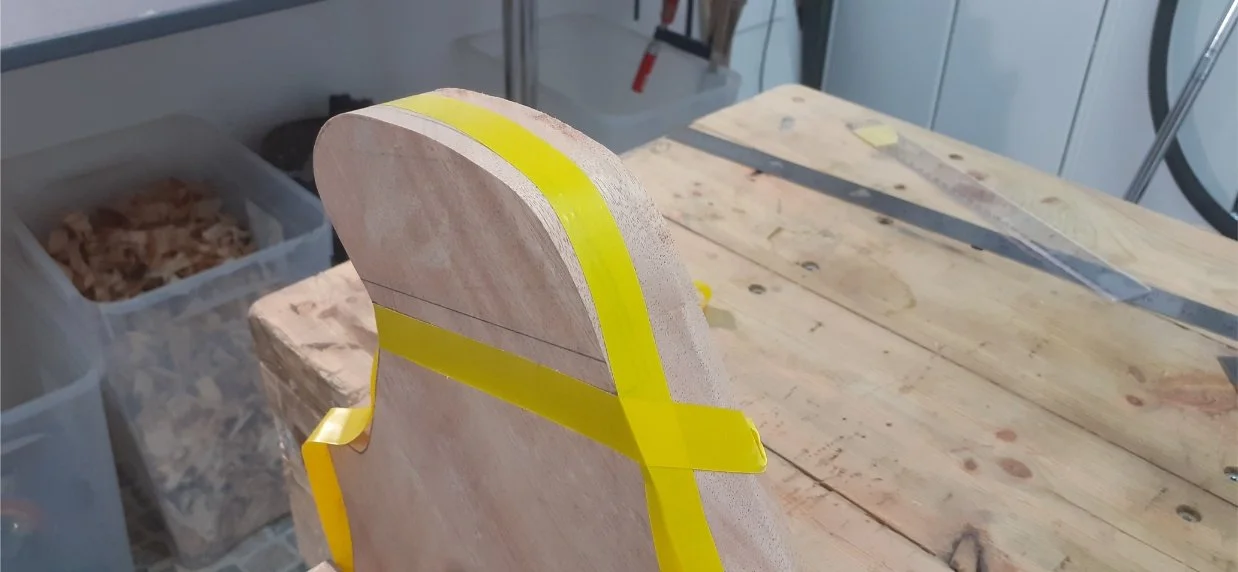
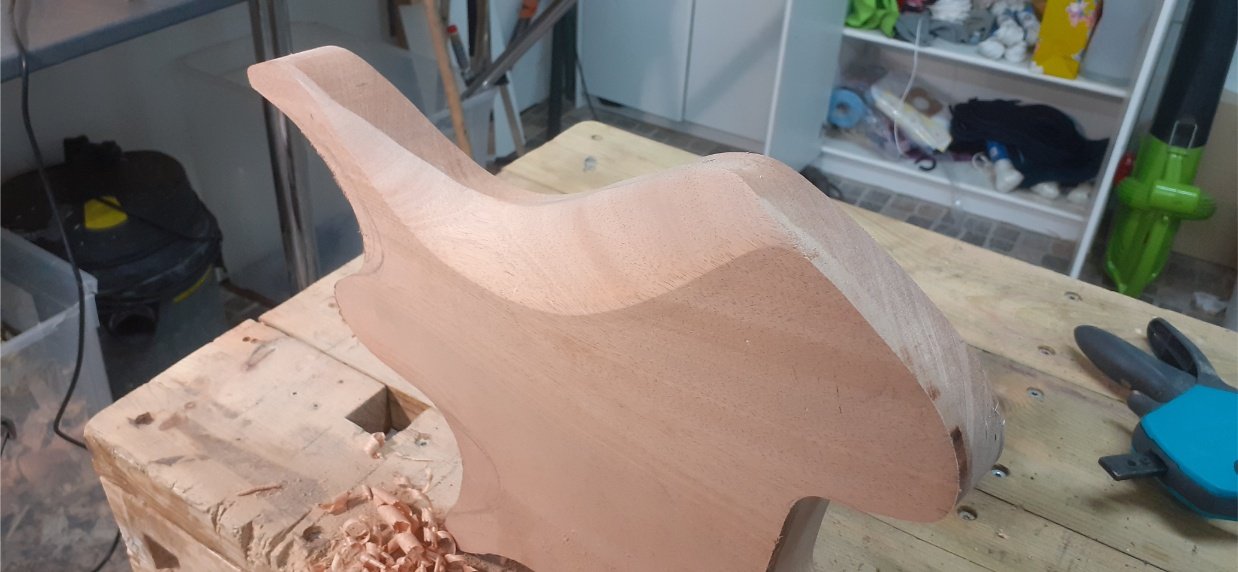
Marking out the forearm contour.
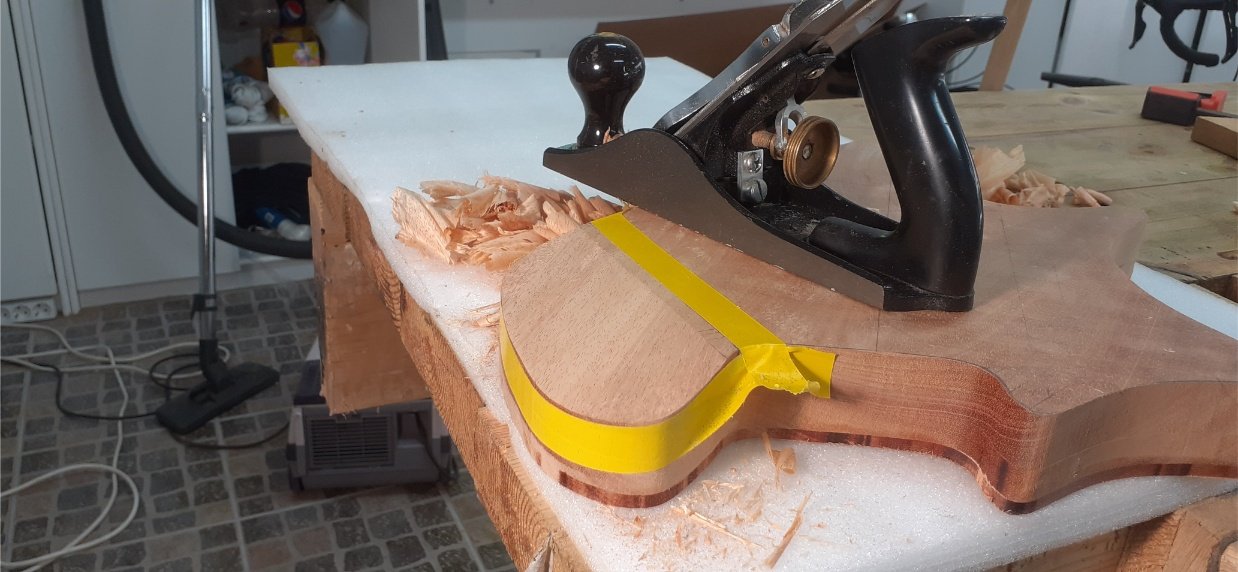
Cutting the forearm contour with the trusty Stanley No.4 handplane.
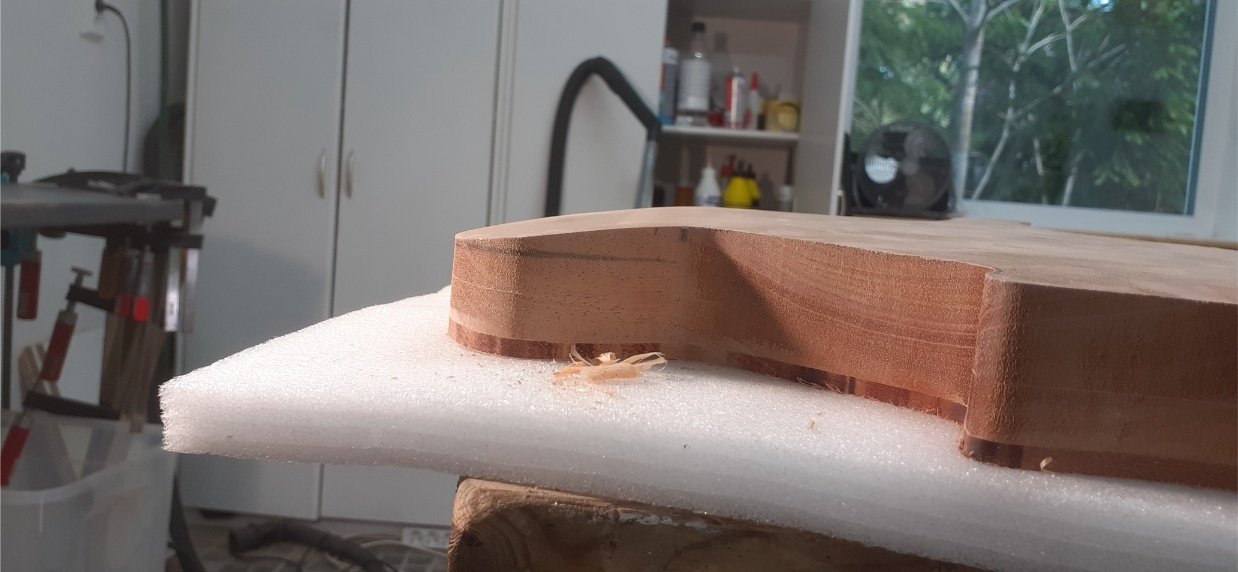
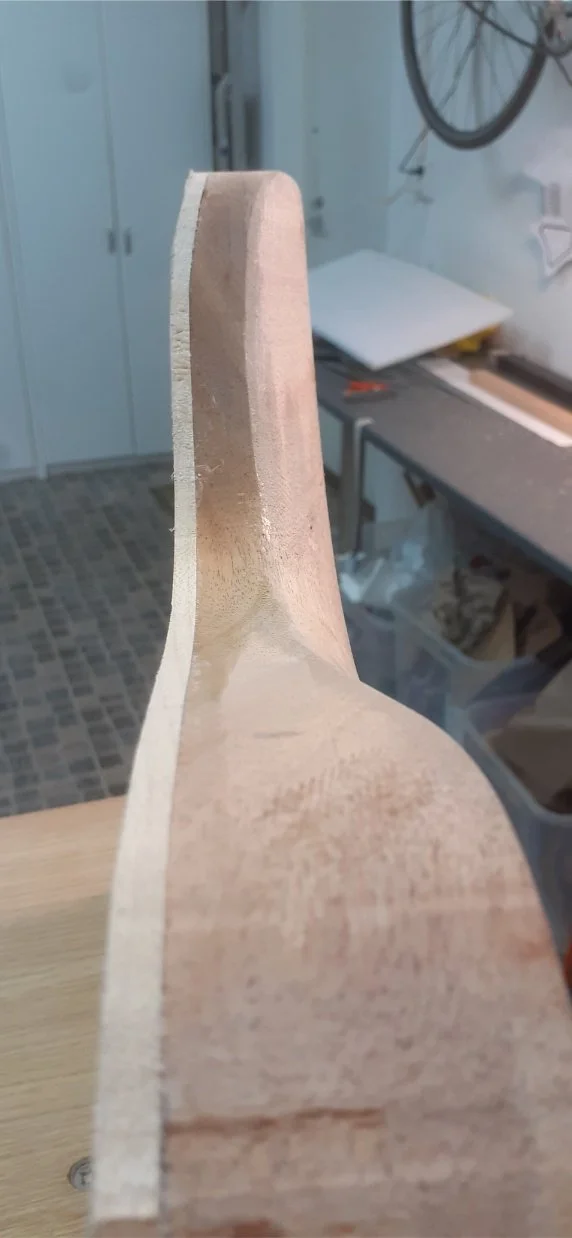
The final shape of the forearm contour. The maple top needs to be bent over this.
Shaping the belly contour. This was a mistake. I should have done this after gluing the maple top on. The contour made it tricky to get clamps on when gluing the top on.
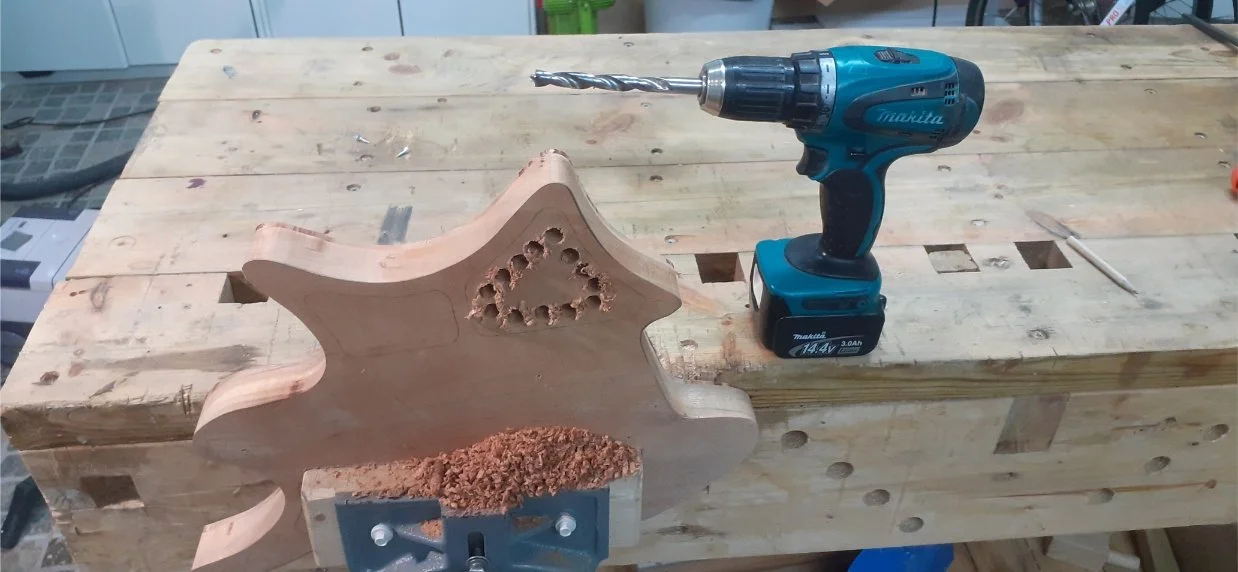
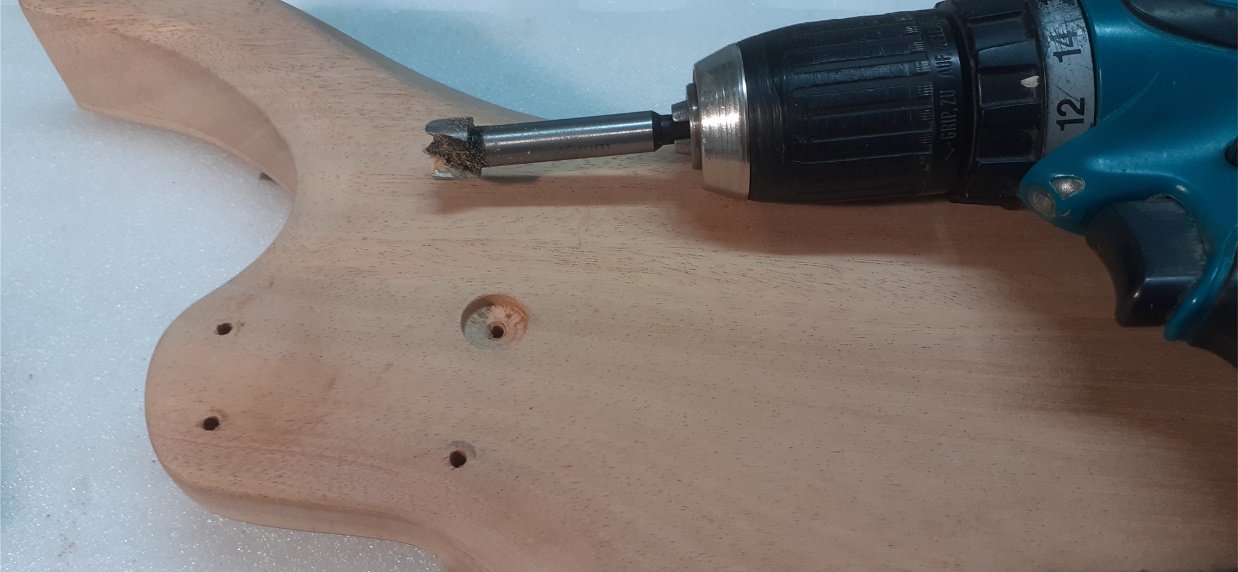
Drilling out the cavity for the electrics. This felt drastic but was fine. On the outside, the hole is covered by the maple top, and on the other side, there is a cover.
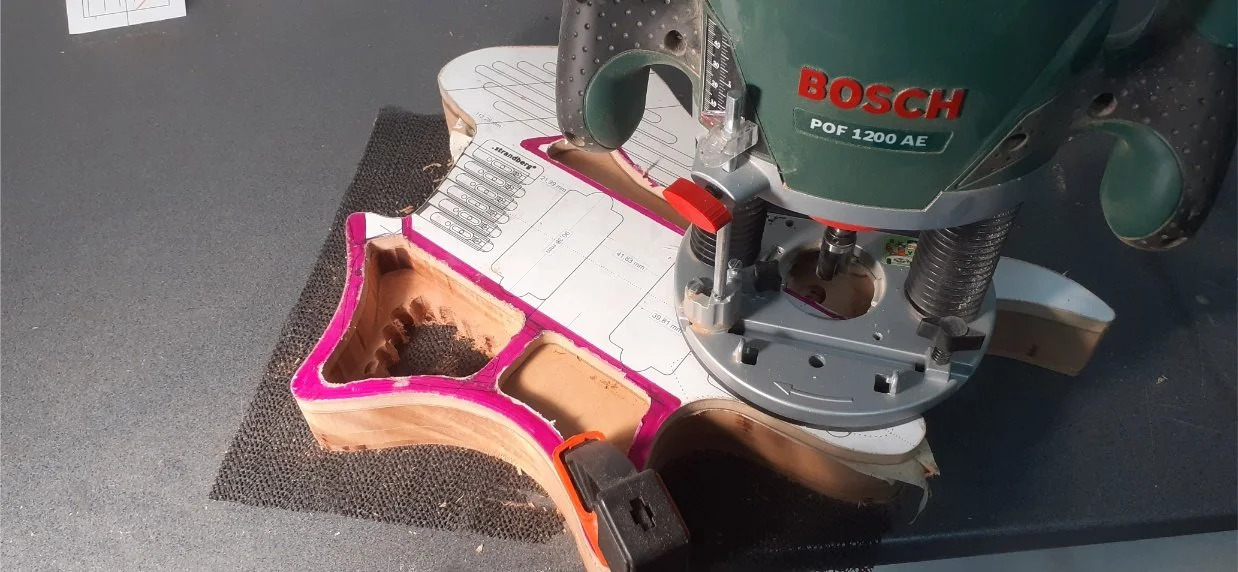
Routing the shape of the cavities and chambers. I wanted to remove as much wood from inside the body as possible to reduce weight and give myself room for the wiring.
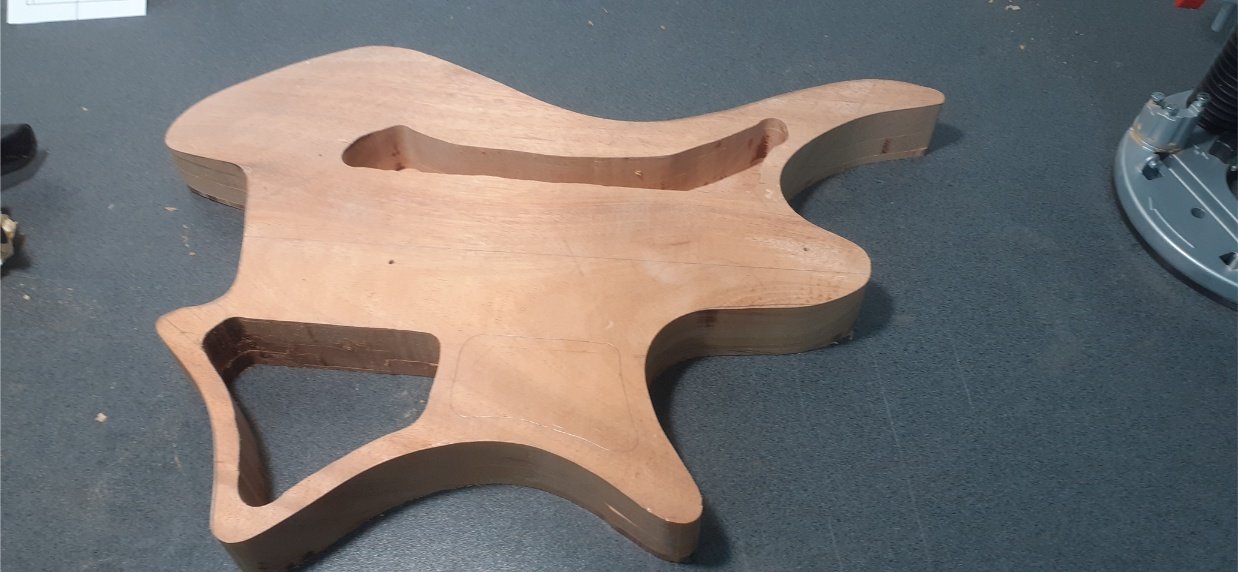
The routed cavities. I ended up removing more wood from both routs.
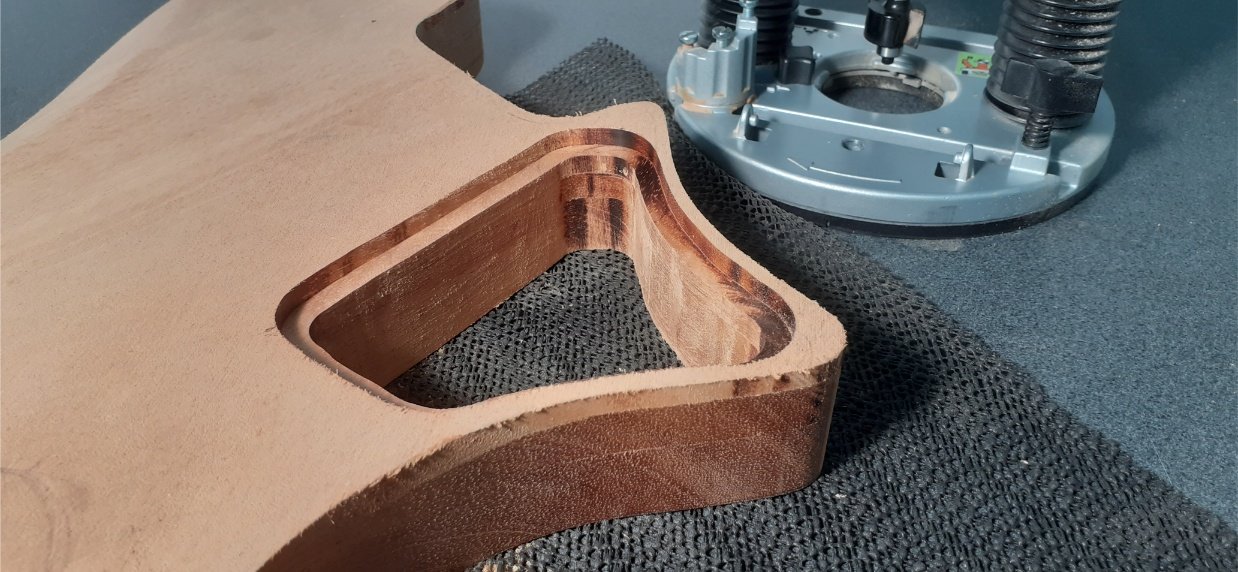
Routing a recess for the cover.
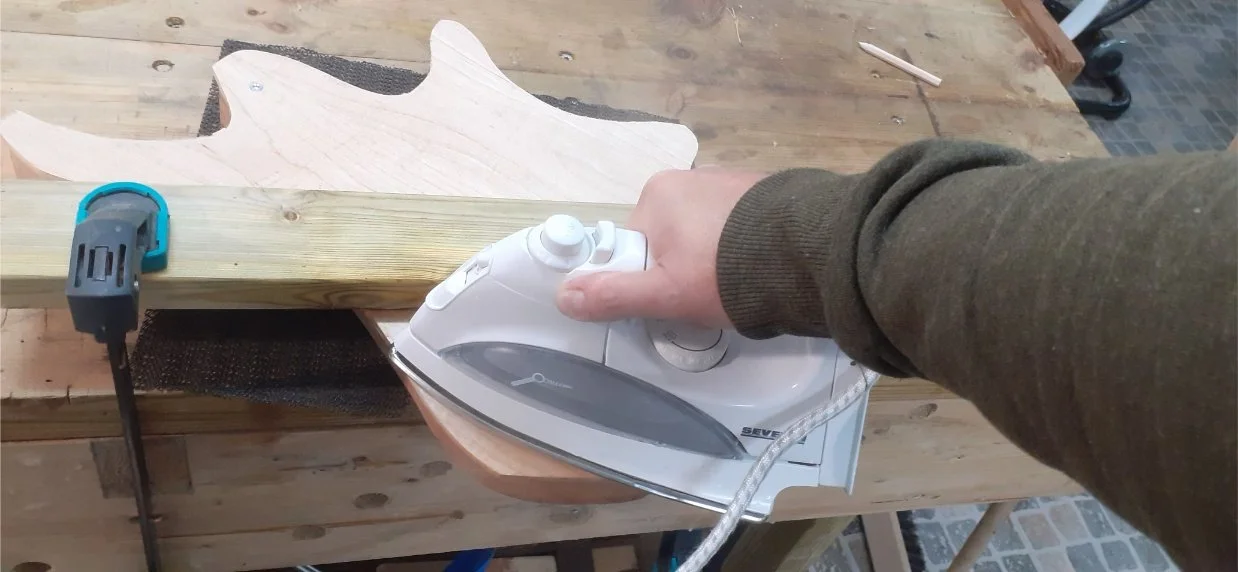
Attempting to pre-bend the maple top with a steam iron. This was partially sucessful. I managed to fix most of the bend into the wood. The remaining bend would be held by the glue.
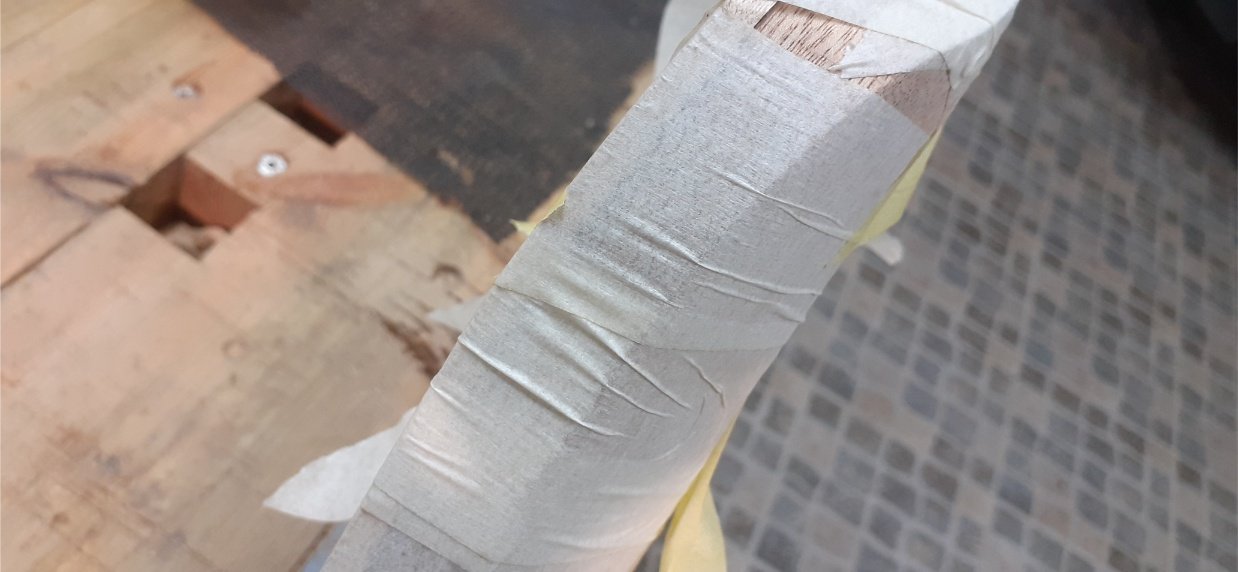
Nerve-wracking glue up. Lots and lots of tape forcing the top to bend over the forearm contour with no gaps.
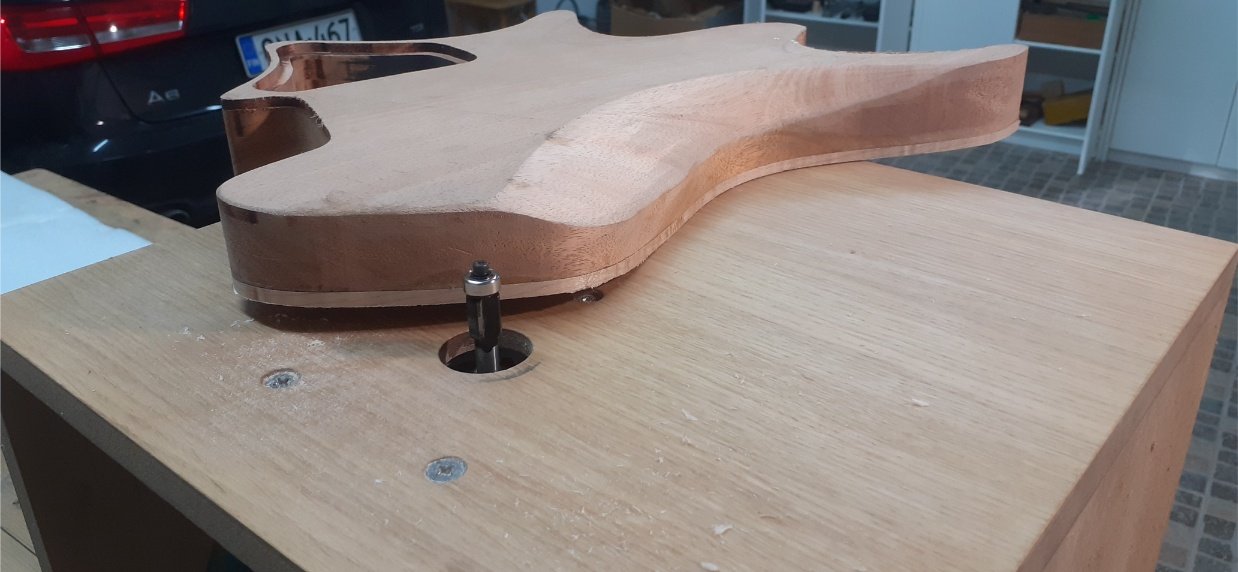
Flush cut bit on the router, to trim the top to size.
I was quite happy with how the join came out.

Marking out exactly where the neck needed to go. I took a lot of time getting this just right.
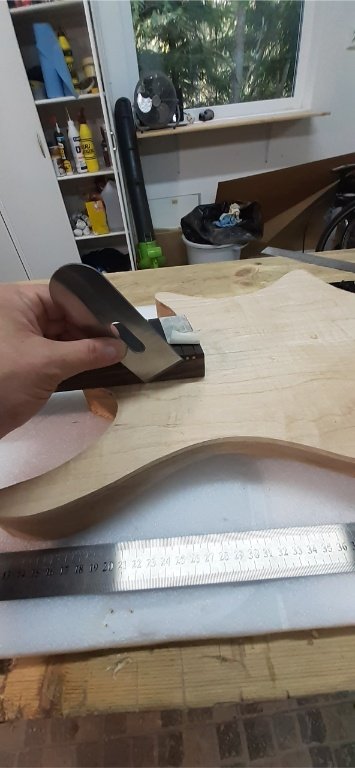
Marking the position of the neck pocket. I often use the blade from a block plane as a marking knife, because the flat side is nice and wide and easy to reference agaist other flat surfaces.
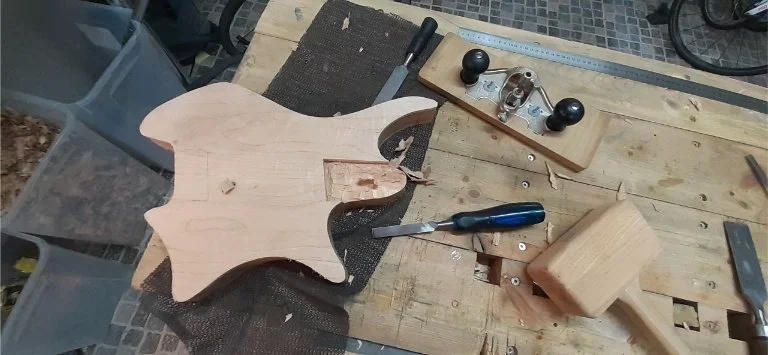
Chopping out the neck pocket the old fashioned way with chisels and router plane. For a one off job this is much quicker than making a template for the power router.

The neck pocket joint was easily tight enough to support the weight of the body.

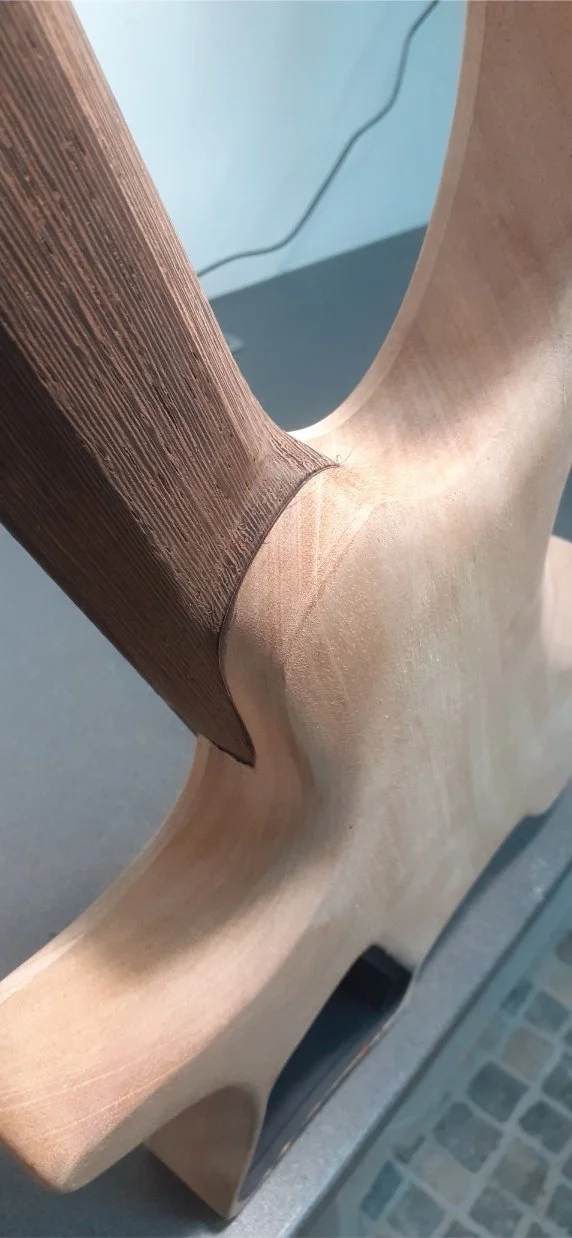
Shaping the underside. I added a heel contour, which is sculpted into the horns.
At this point I considered gluing in the neck, rather than using the usual bolt on attachment. I decided to go with the bolts however, as the neck was the first one I had ever made, and if it ended up being rubbish, it would be easier to remove it and make a new one.
Drilling the screw holes, and recesses for ferrules.

The marraige of the neck to the body. It was starting to look like a (slightly odd) guitar at this stage.
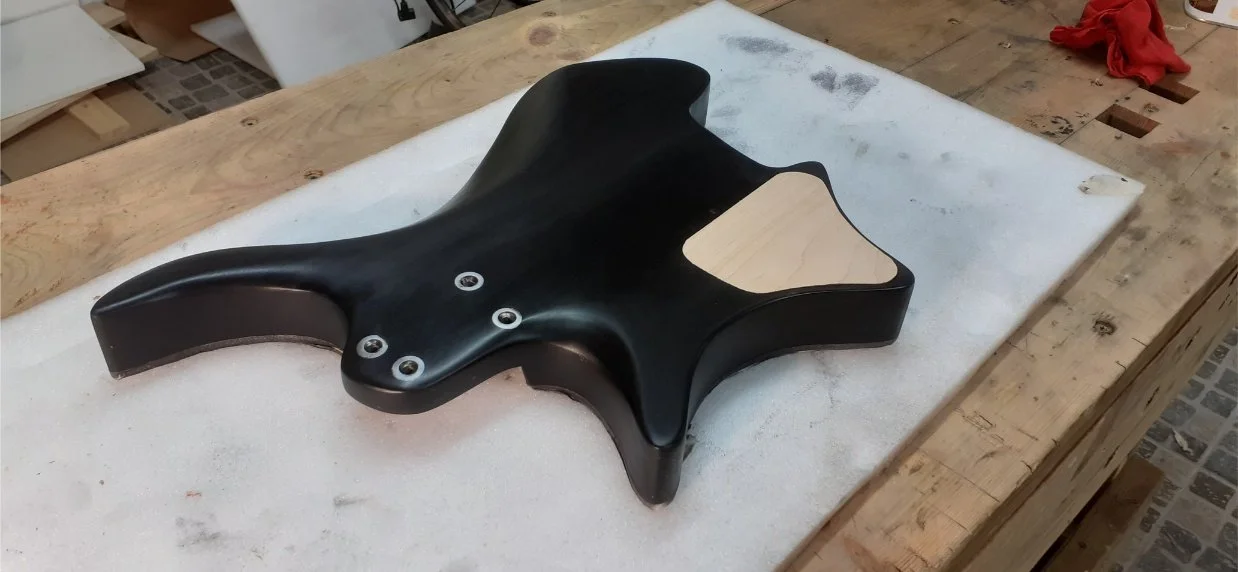
The back and sides of the body was stained black, but leaving the edge of the top unstained. I used gloss Osmo oil over the stain. It looks pleasingly sleek and organic. At this point I had also made the cavity cover from left over maple.

The cover is attached with magnets, and one corner has a bevel, so when you press it, the other end flips up. This works nicely.
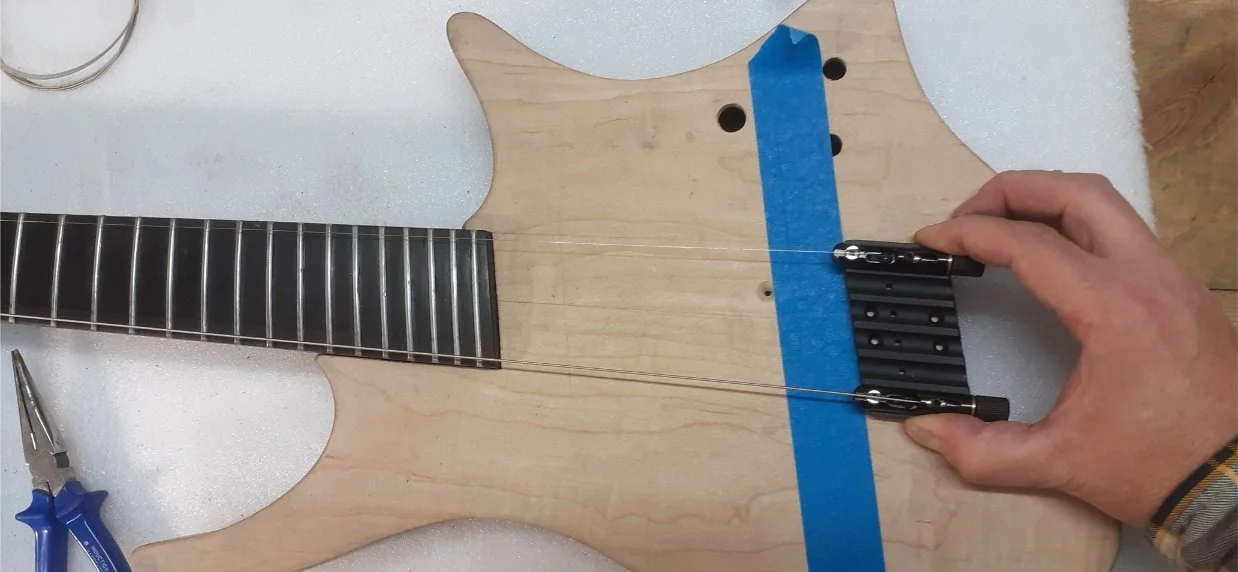
With the neck position finalised, I could finalise the position of the bridge. The bridge is a special angled one from Mera Guitars, with the perfect angle for my chosen scale lengths. (Cllick the image to link to Mera.)

The critical job of poisitioning the bridge. I attached the high and low E strings and used them to get the bridge in just the right place, with the strings the right distance from the edges of the fingerboard, at the same time as getting the string length on each side just right. This required some fiddling. When it was right, I clamped the bridge in place, and scribed the masking tape and marked where I needed to drill for mounting screws.
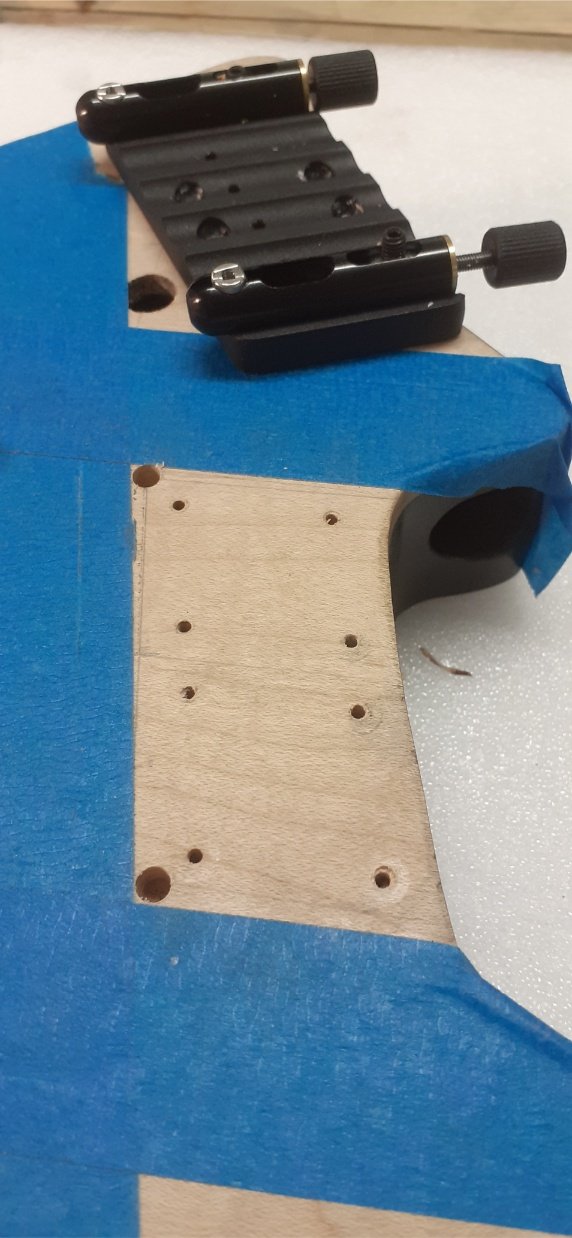
Pilot holes for the bridge mounting screws, and holes drilled in the corners to give a rounded corner to the recess, matching the bridge base plate. This area needs to be recessed by 5mm to get the string height in the right ball park. This was by design.

The recess for the bridge ended up being almost exactly the same thickness as the maple top, so the final pass of the router plane revealed the mahogany underneath.
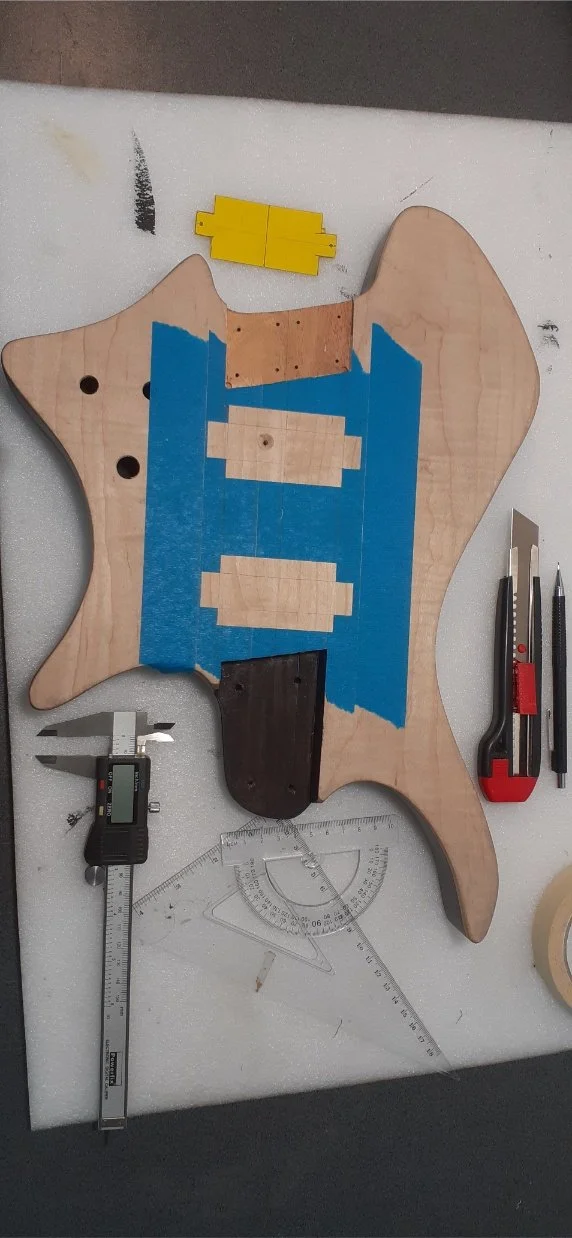
Marking out the positions for the pickups. I agonised about whether I should angle the pickups to match the angle of the bridge, but I mocked it up and it just looked stupid and wonky. I used Lace Deathbucker pickups, which are standard humbucker sized but work rather differently. Even if I had had a humbucker routing template I would not have used it, because I wanted the tightest possible fit for the pickups, as I was not going to be using a pickup ring.

And drilling out the holes, using forstener bits, then lots of chisel work.
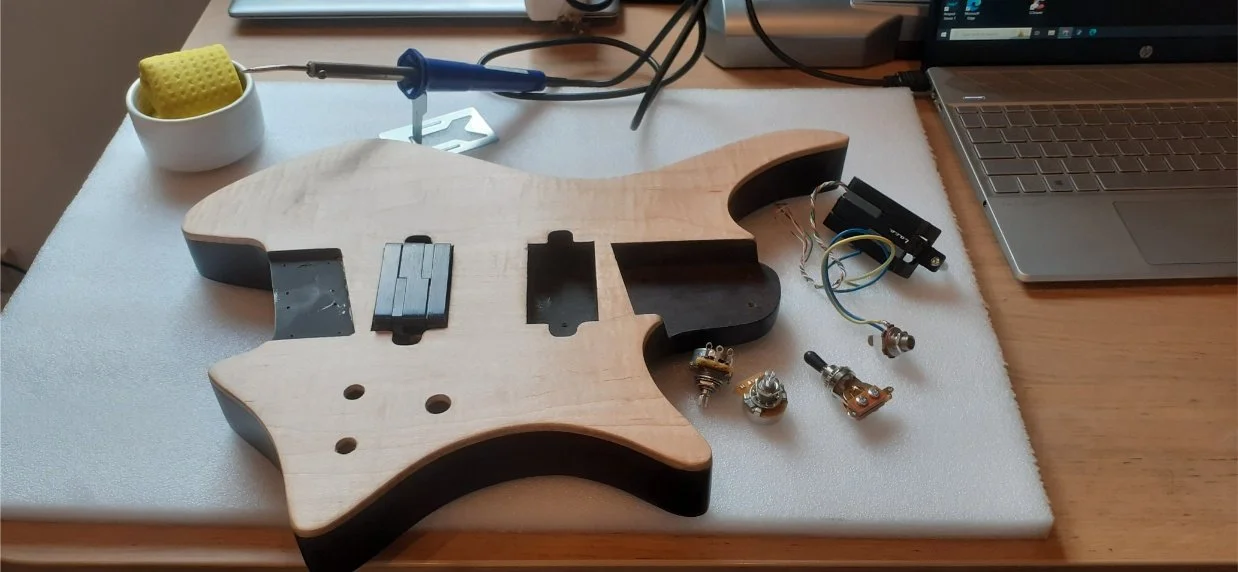
All the cavities were painted with sheilding paint, and the final construction could finally begin. I hate soldering.